- Access client are by the following link ( my.exahost.com )
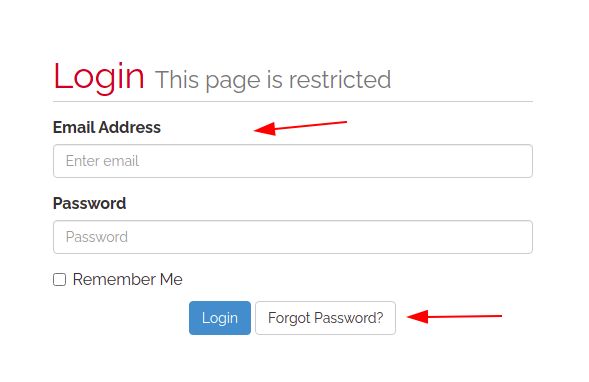
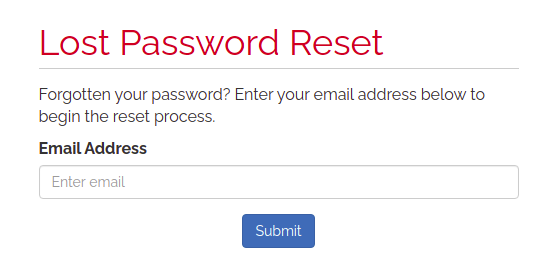
- Enter your registered Email address then click forget password
- Enter your Email address again the press on Submit
- An Email to reset your password will be sent to your registered email address
- Access client are by the following link ( my.exahost.com )
- Enter your registered Email address and password
- In case you have lost your password click on forget password then enter your Email address again and an Email to reset your password will be sent to you .
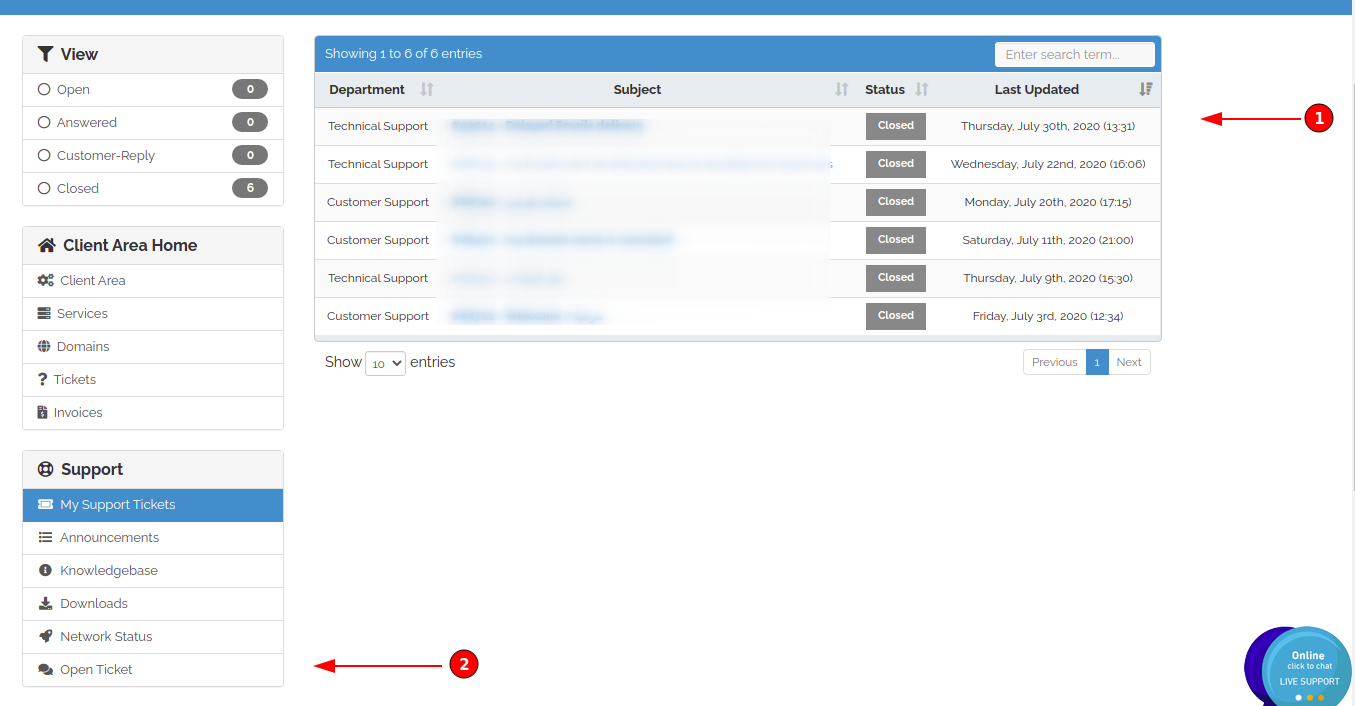
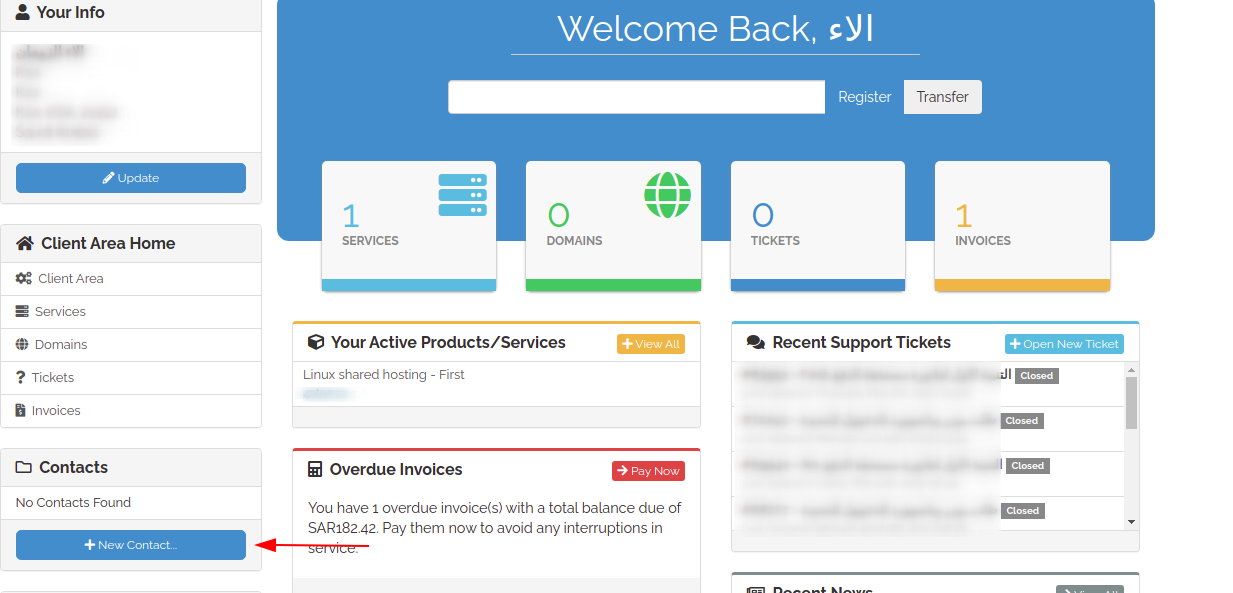
- After accessing your client area press on “Tickets box” in client are interface

- Choose open ticket bottom at the sidebar (2) , you can also preview your account ticket (1)

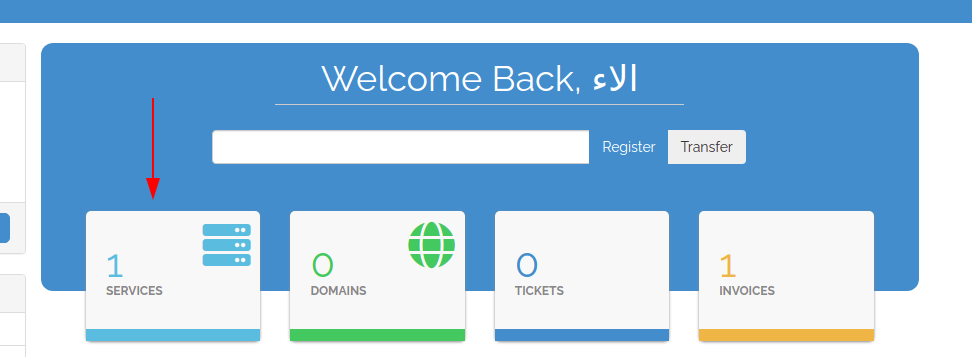
- Access Client Are By The Following Link ( My.Exahost.Com )
- Then Click On “Services Box” At Client Area Interface
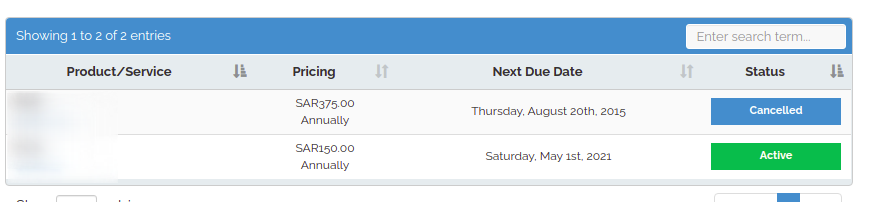
- Choose The Required Service Then Press On It
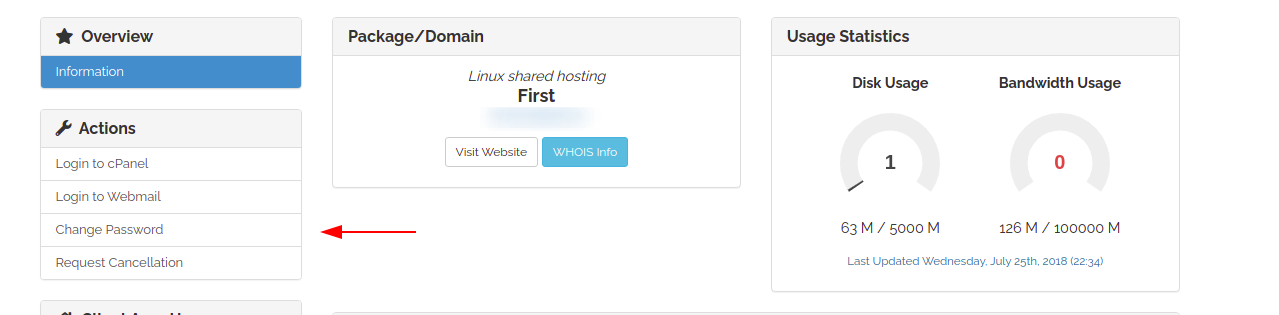
- Click On Change Password At The Sidebar And Enter New Password Then Save Your Changes
Access client area by the following link ( my.exahost.com )
Then press on sub contact icon at the sidebar as per attached
Enter sub contact information ( Name , Phone , Address .. etc )
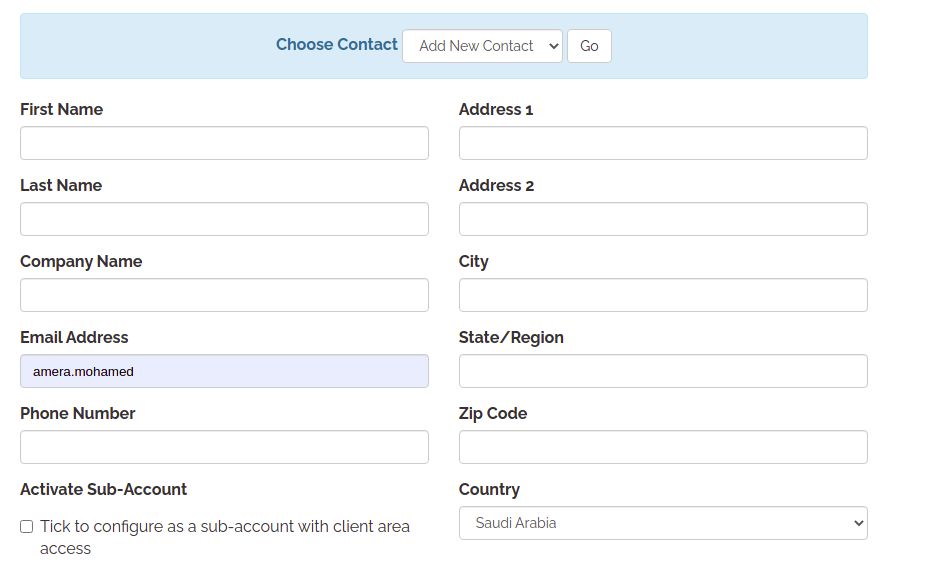
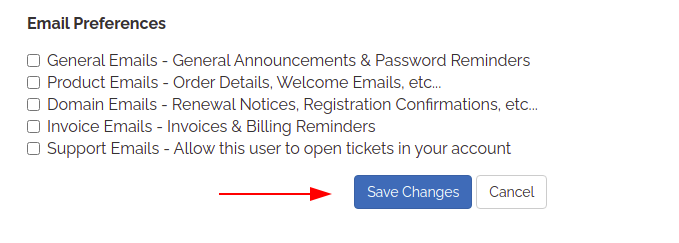
Choose the sub contact permissions on your account , press on save changes
Access client are by the following link ( my.exahost.com )
Then press on “Invoices box” at client area interface
All your account invoices will appear 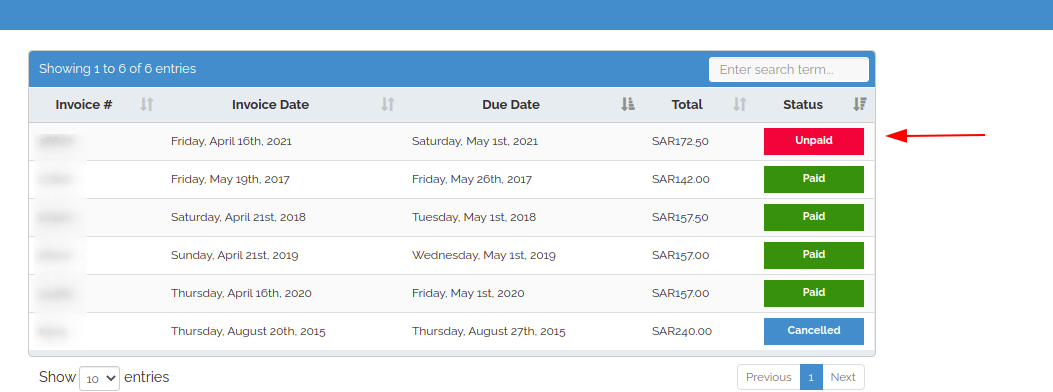
Choose the invoice then select Paypal as a payment method ,a check out icon will appear at the top of the invoice press on it 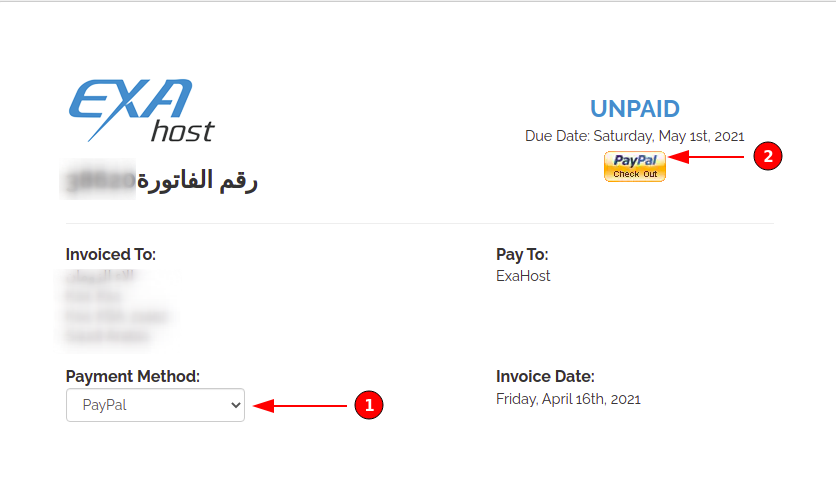
Finally enter your Paypal account info or create new account 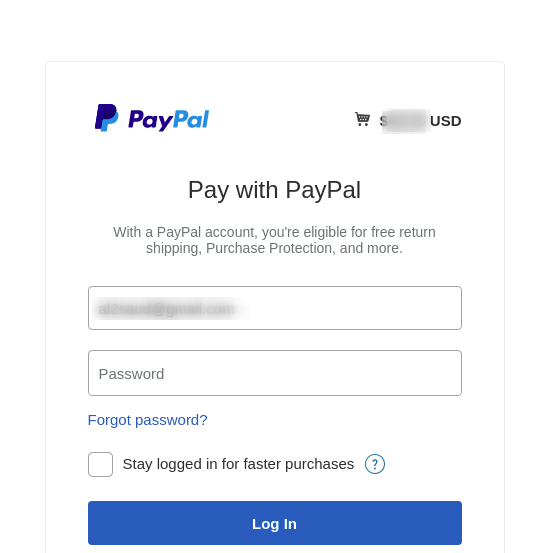
You can also follow these instructions to pay by Credit Card , choose Credit card as payment method then press on Pay Now button and enter your card data . 
Access client are by the following link ( my.exahost.com )
Then press on “Domains box” at client area interface
Choose the domain that you need to modify its contact information ,press on management sign in the right and Click “edit contact information” 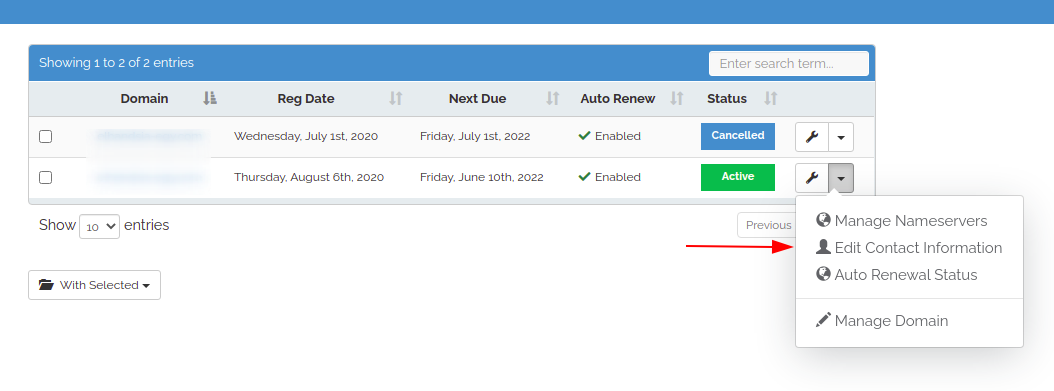
Finally after modification save your changes 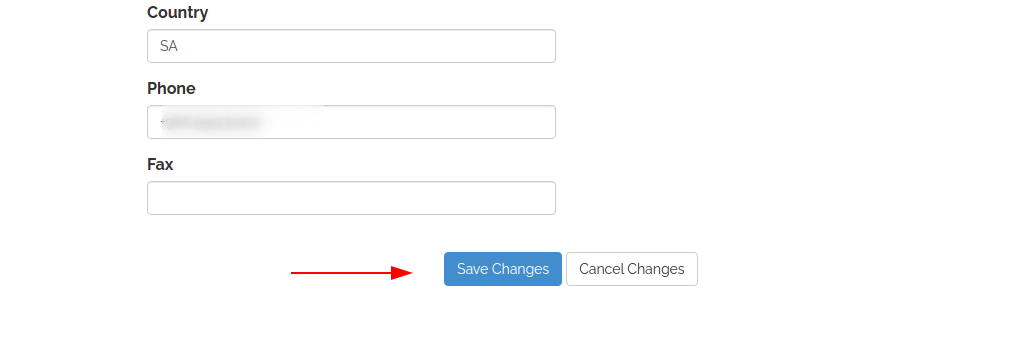
Access client are by the following link ( my.exahost.com )
Then click on “Services box” at client area interface 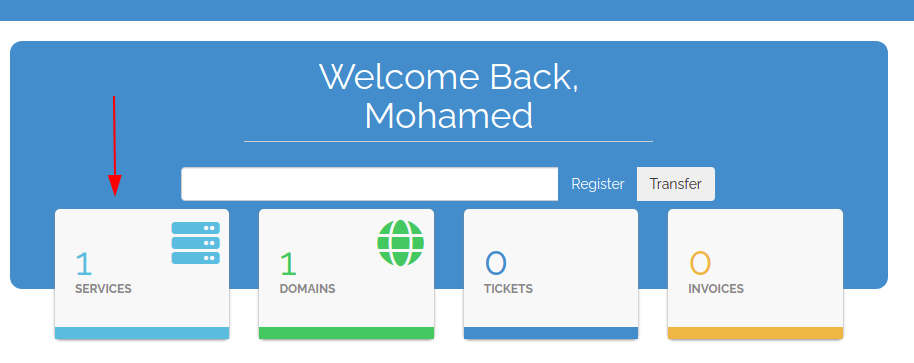
Choose the required service then press on it 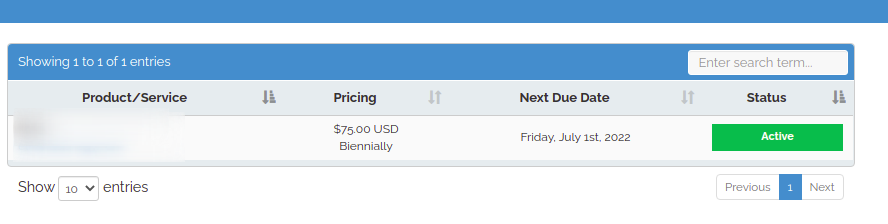
From “Action box” in the left press on “login to c panel” or to access webmail press on “login to Webmail” 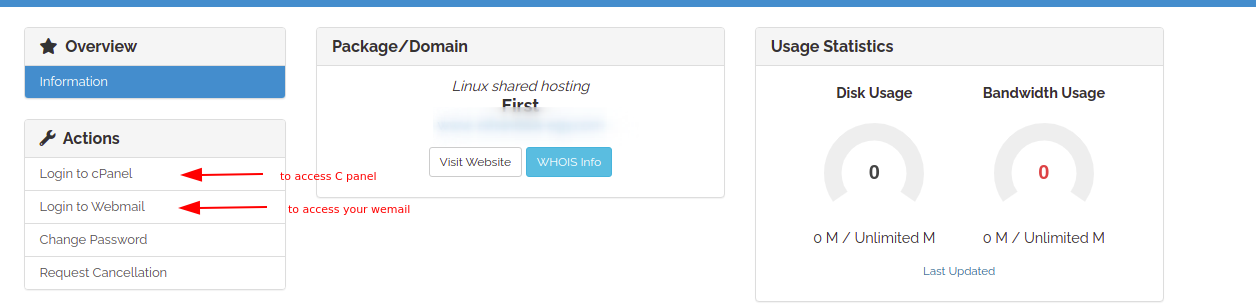
Access client are by the following link ( my.exahost.com )
Then press on “Domains box” at client area interface 
Choose the domain that you need to modify its name servers and Press on management sign in the right then click “manage nameserver” 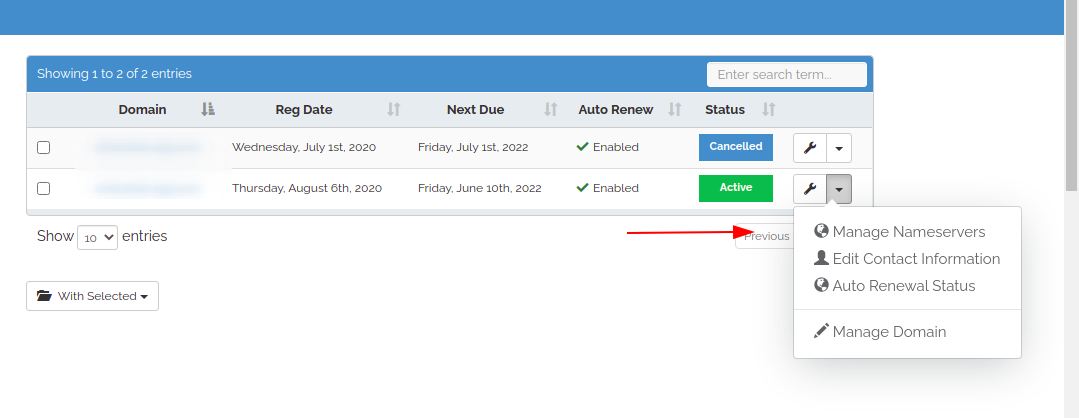
Finally enter required nameservers then save changes 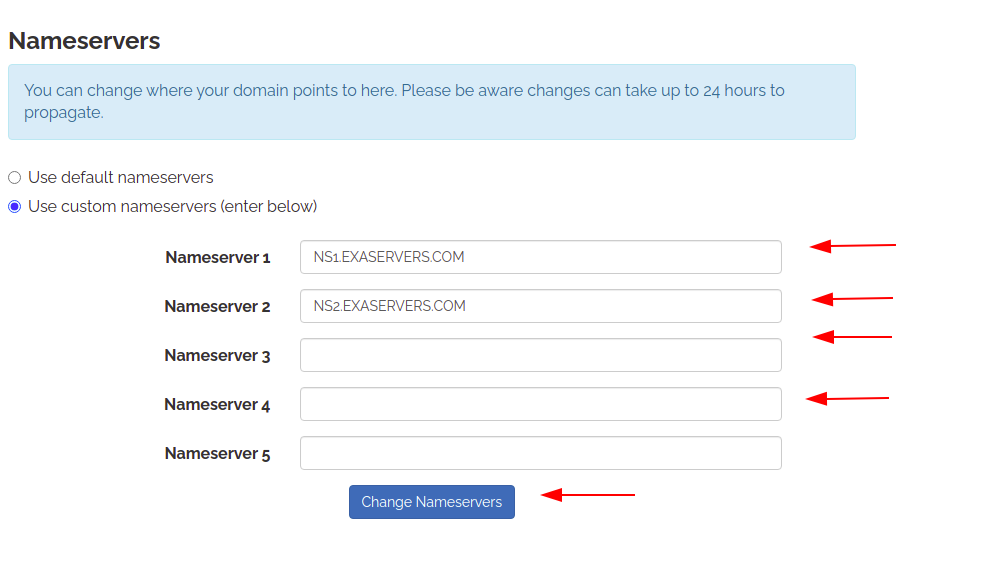
Kindly follow these steps after login to your Cpanel
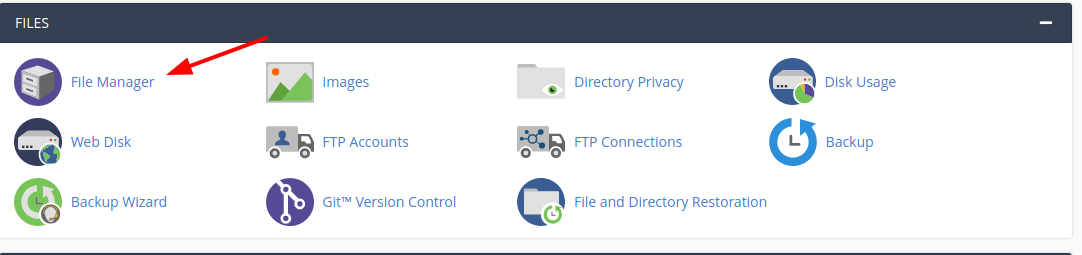
1 – click on “File Manager” icon at the first section

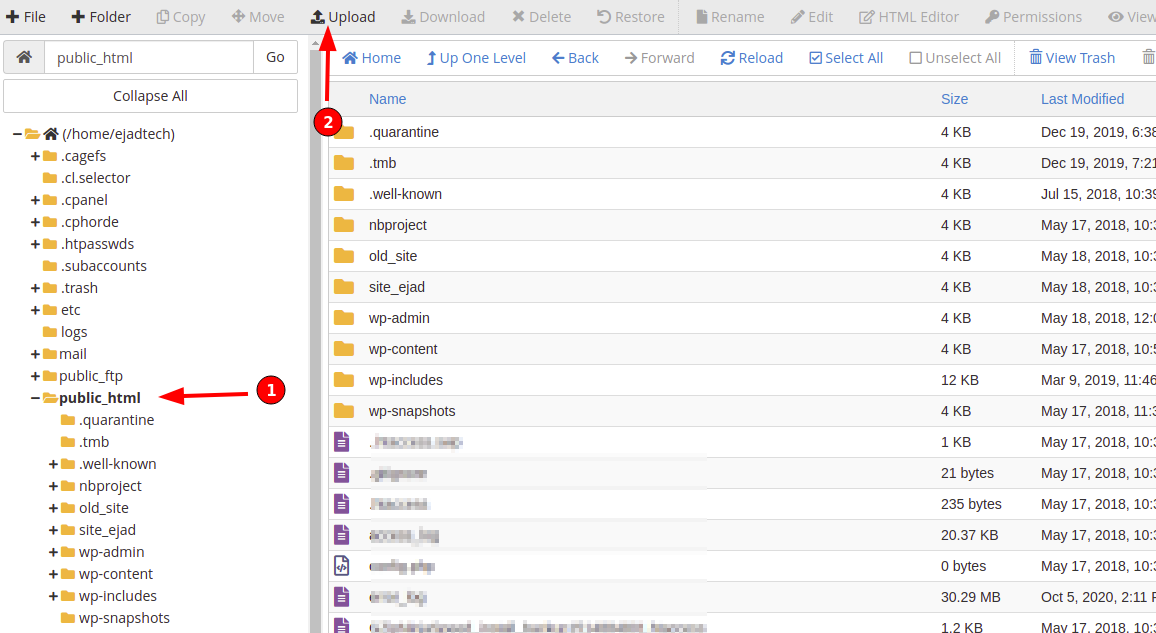
2- Choose file “Public_Html” then press “upload” above and select required files

1 – access your Cpanel using Username and Password
2 – from Files section select “FTP account” 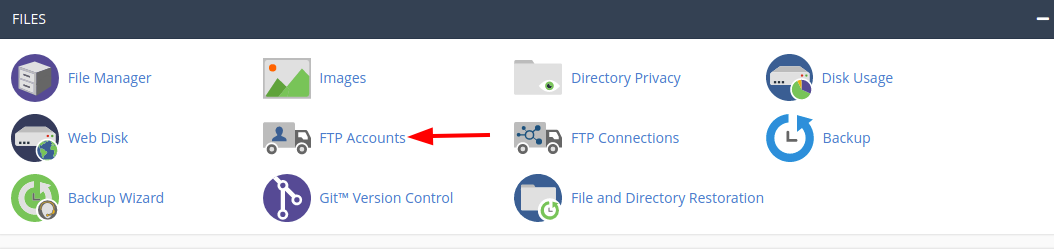
3 – Enter Username and password for the new account then press on create FTP account in the bottom 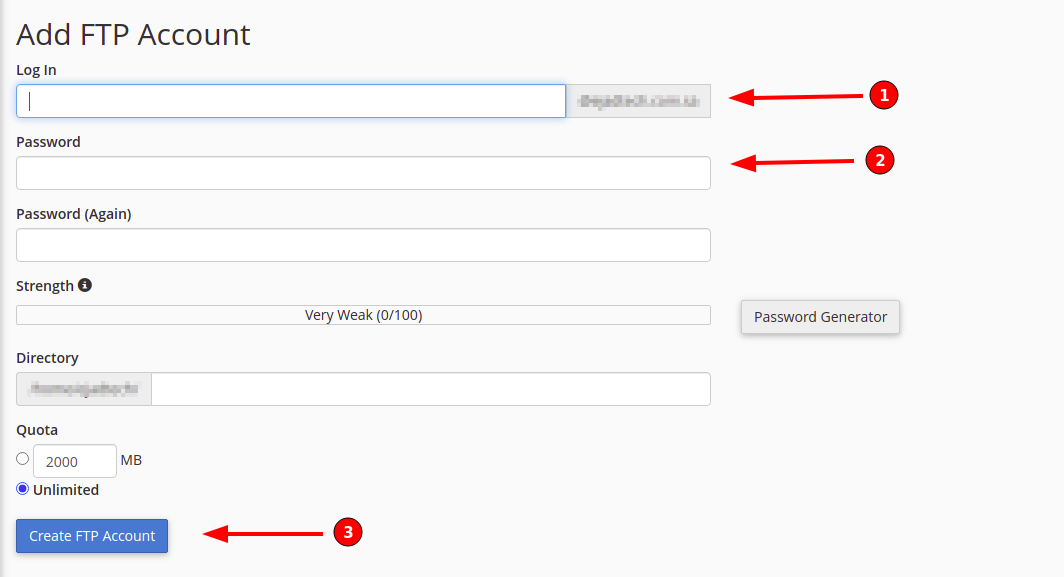
Your FTP account has been created successfully
1 – access your Cpanel using Username and Password
2 – click on “Backup” icon at “Files” section 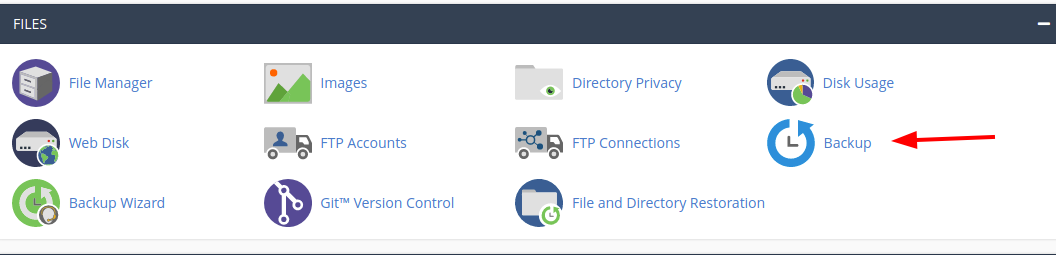
3 – you can download full backup From the icon referred to as number (1) , or you can download a specific backup version from the icon referred to as number (2) 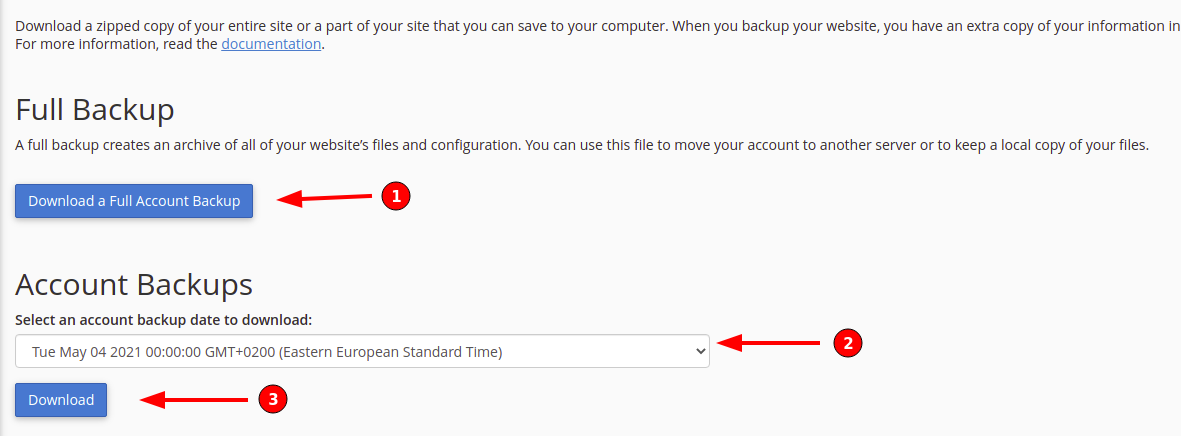
5 – and finally press on “Download”
1- click on “MYSQL Database” icon at database section in Cpanel interface 
2- Enter required name for the new database at the bar referred to as number (1) then press “Create Database” 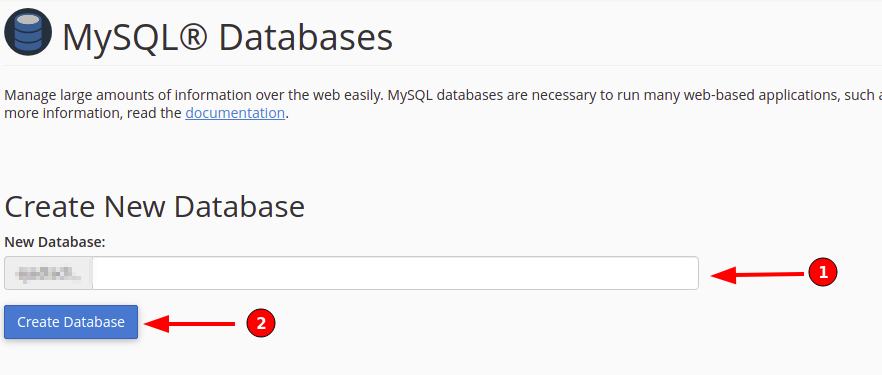
3- in case you need to add new user to a specific database, at the bottom of the same page enter required username and password then press “Create user” 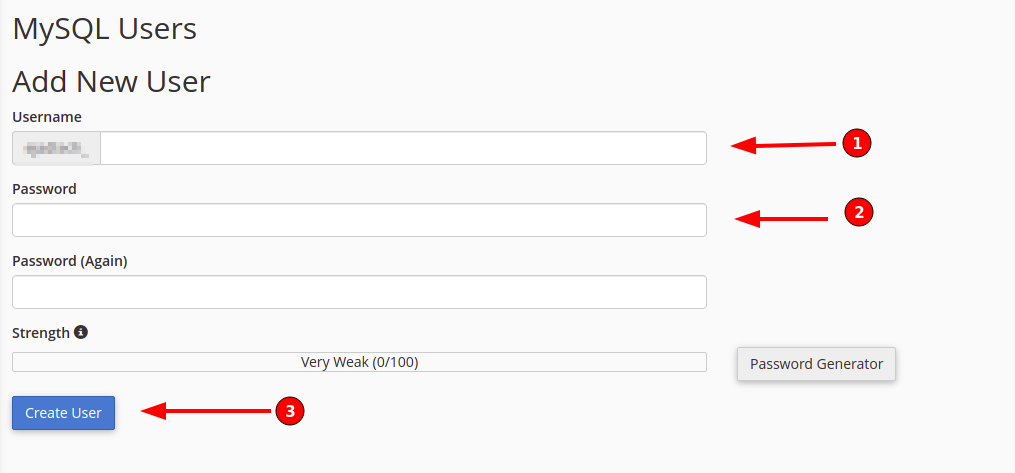
4- to add database to user from “add user to database” choose the user and required database then “Add” icon as per attached . 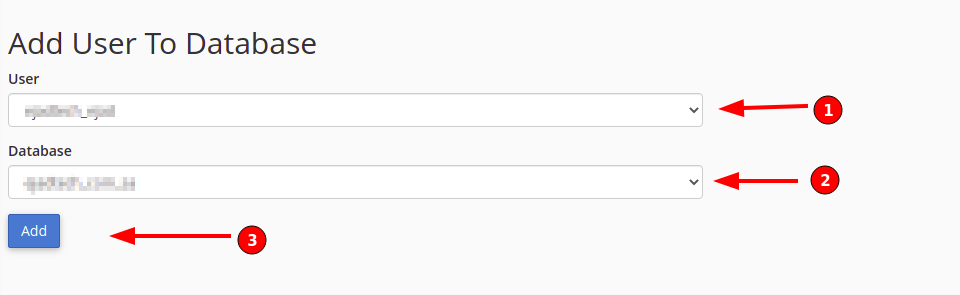
- How to Create Email account through Cpanel
1 – access your Cpanel using Username and Password
2 – choose “Email account” icon from Emails section at Cpanel interface 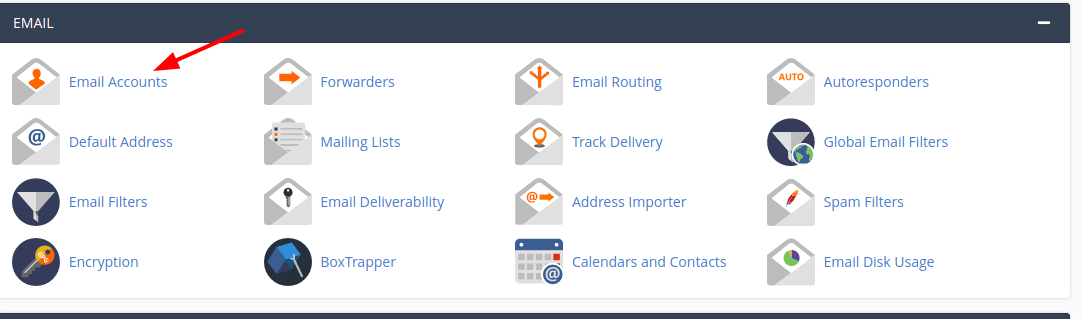
3 – click on “Create” icon 
4 – Enter the required domain name in case you have more than one at your plan, then Email address (1) and password (2) ( by pressing on “Generate” (3) a suggested password will be written automatically it is safer, then save this password ), from the icon referred to as number (4) choose Email quota then press “ Create” (2)
1 – choose “Forwarders” icon from Emails section at Cpanel interface 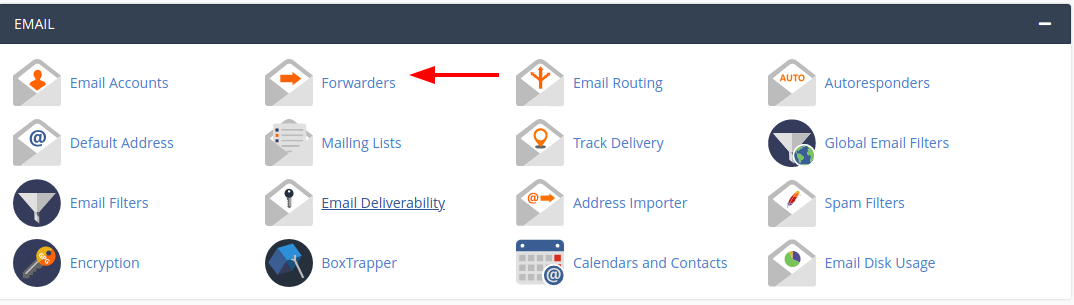
2 – press on “ Add Forwarder” 
3 – enter Email address you want to forward from at the bar referred to it as number (1), then enter Email address you want to forward to at the bar referred to it as number (2), finally press on “Add Forwarder” botton 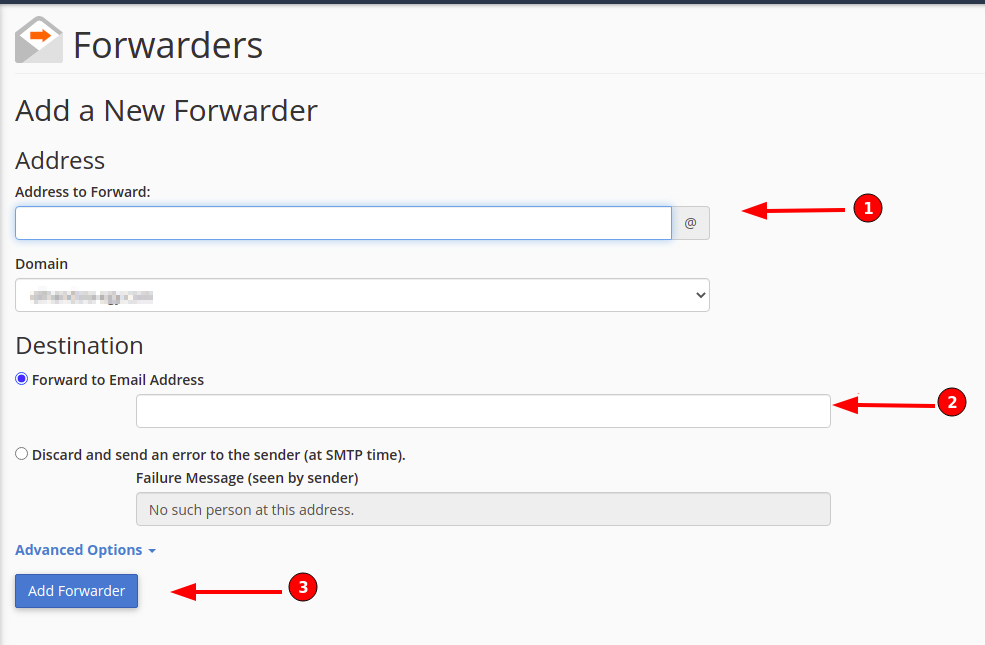
4-to redirect from Domain to another click on “ add domain forwarder” 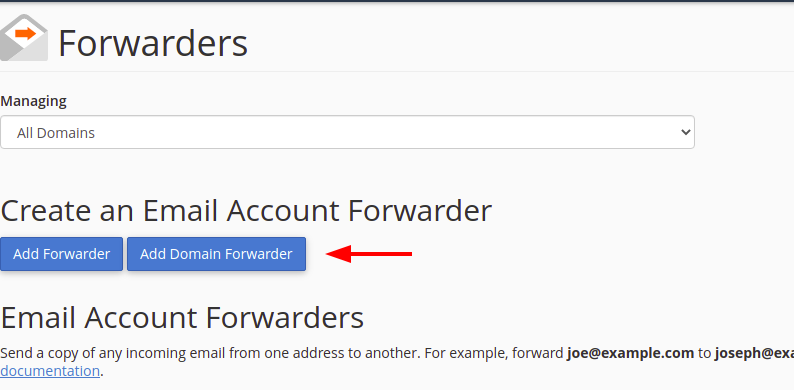
5 – from the icon referred to as number (1) choose domain you want to redirect from, the icon referred to as number (2) choose domain you want to redirect to 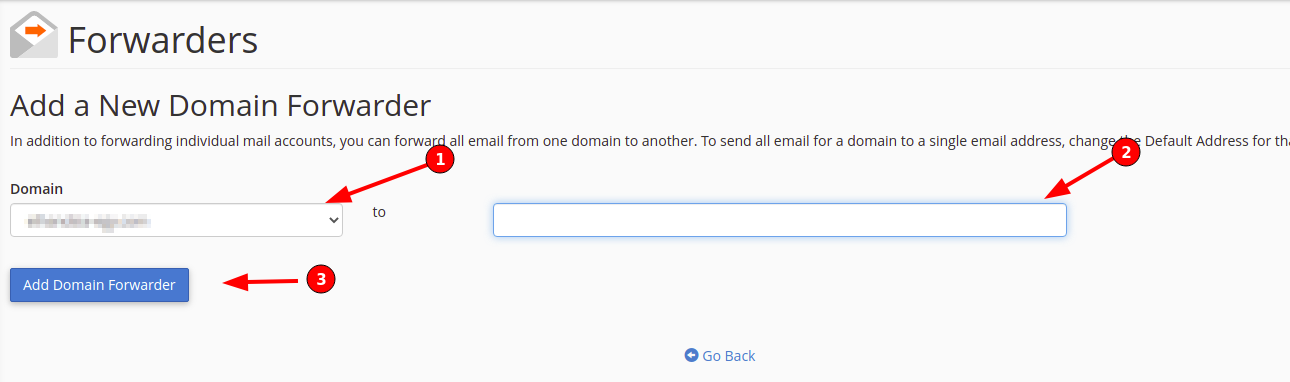
access your Cpanel using Username and Password
Choose “subdomains” icon from “Domains” section 
Enter required subdomain name (1)
Choose the domain that you want to create subdomain for it, in case you have more than one domain in your plan (2)
Then press “Create” (3) 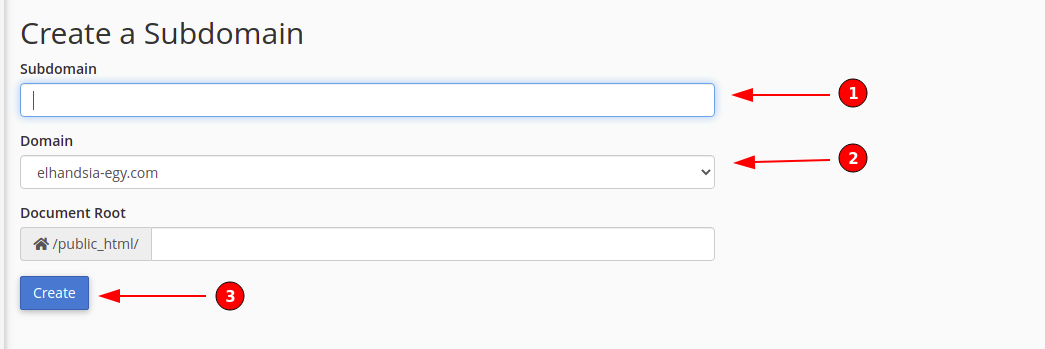
access your Cpanel using Username and Password
Choose “Addon Domain” icon from “Domains” section 
Enter Addon Domain name , Then press “Add Domain” at the bottom 
You can upload files to this new domain from file manager at Cpanel
Also you can manage your plan’s addon domains
access your Cpanel using Username and Password
Choose “”Aliases” icon from “Domains” section 
Enter Domain name (it must be registered domain name ) ,Then press “Add Domain” at the bottom 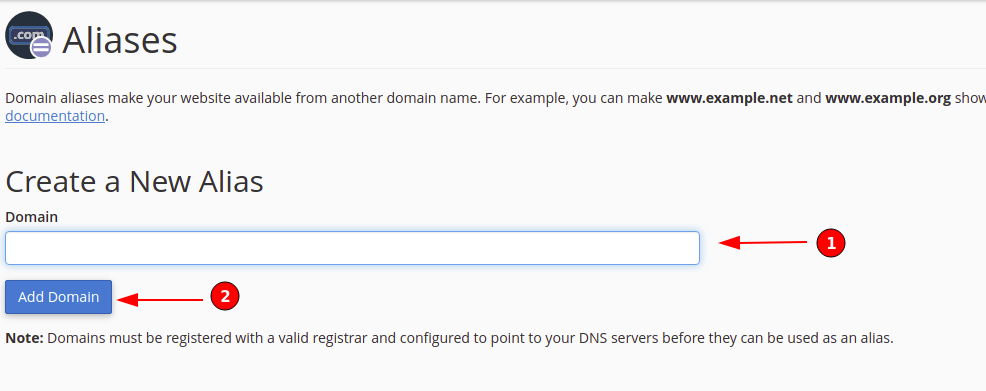
access your Cpanel using Username and Password
Press on the “Redirect” icon at the “Domains” section . 
From number (1) choose domain name that you want to redirect from then choose the domain name that you want to redirect to from number (2) then finally press “Add” 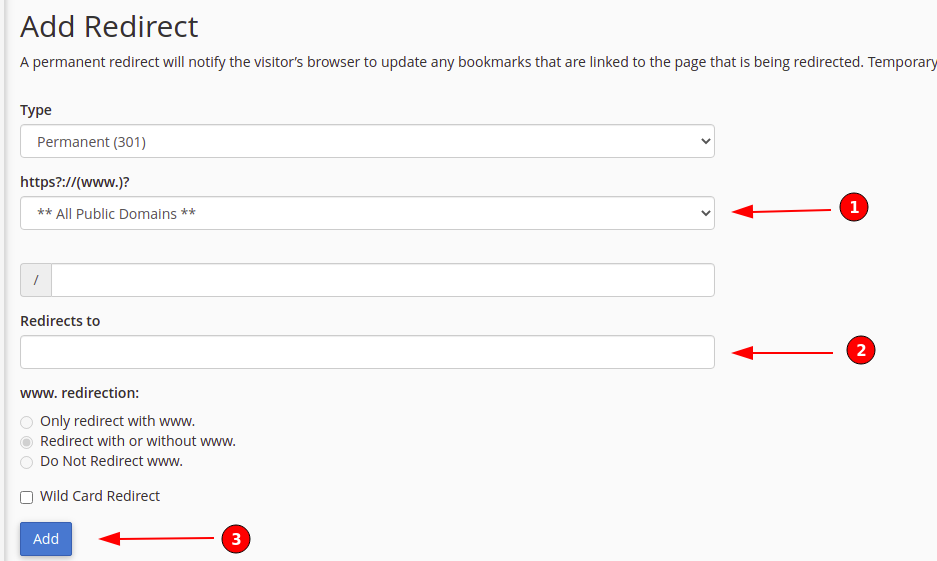
Click on “Zone editor” icon at C panel interface 
Then click “manage” button 
All your domain records will appear now you can press on “Edit” and go 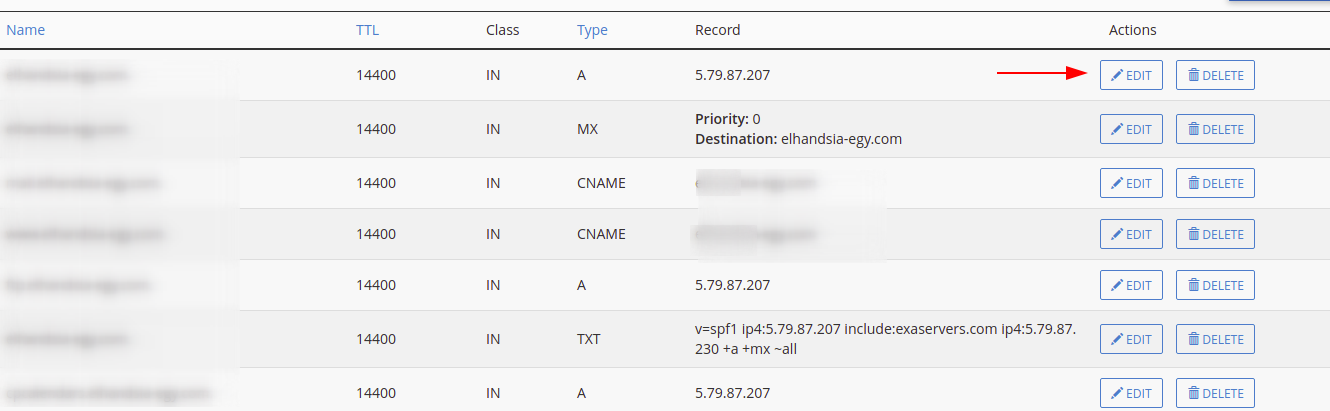
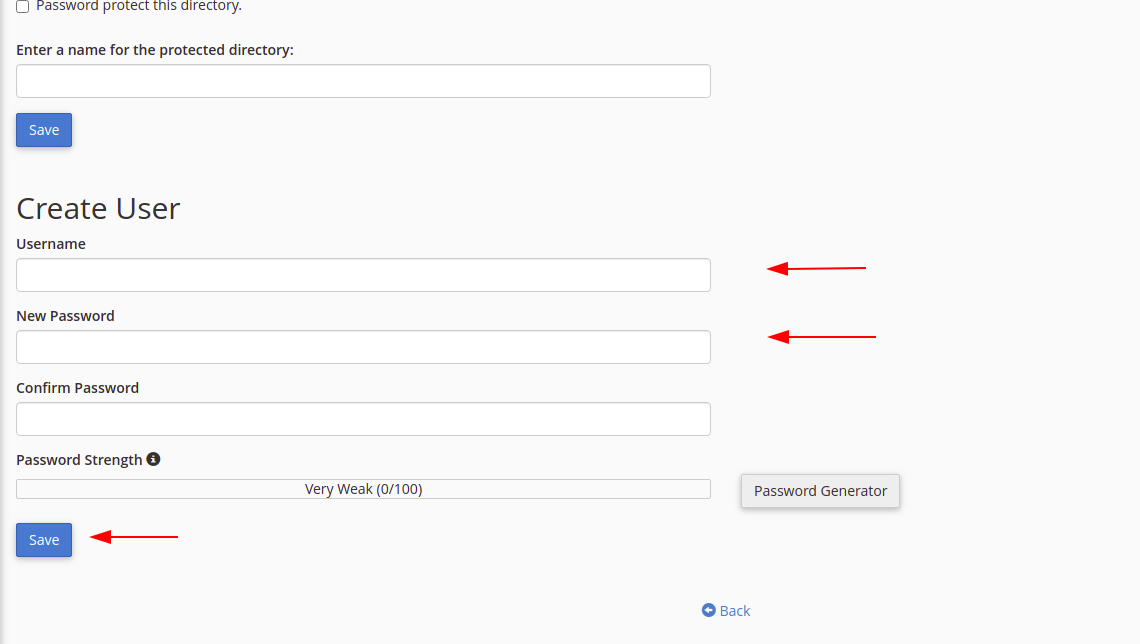
Click on “Directory Privacy” at files section 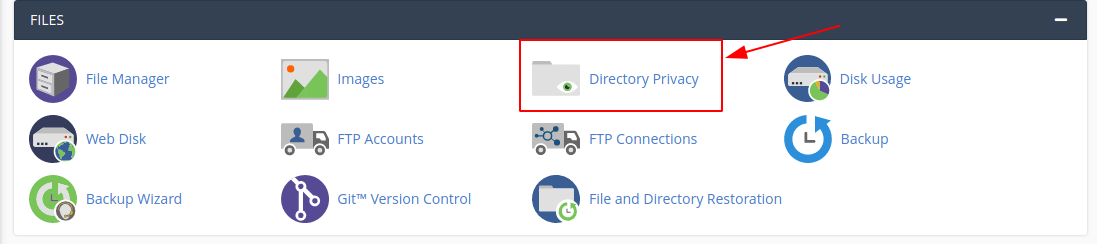
Then choose the file you want to secure 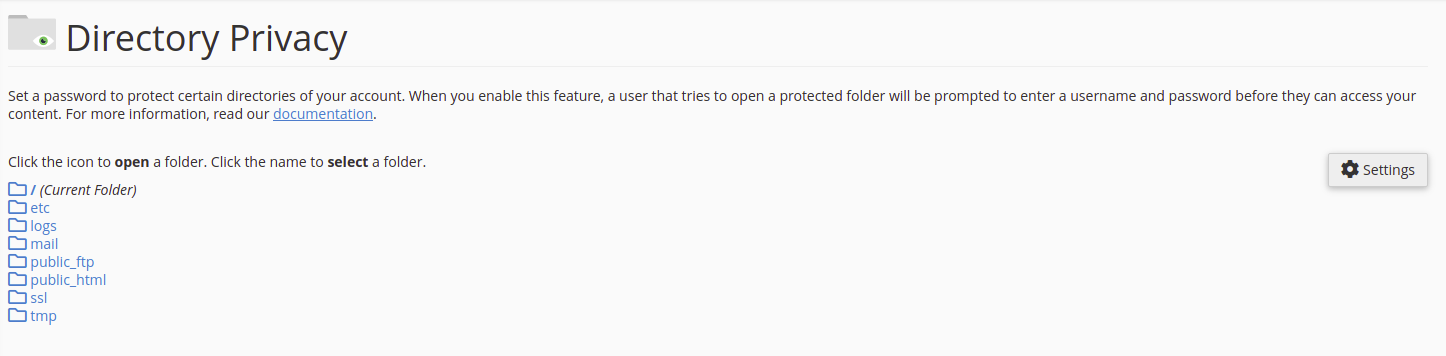
add a check mark at Password protect this directory then press save 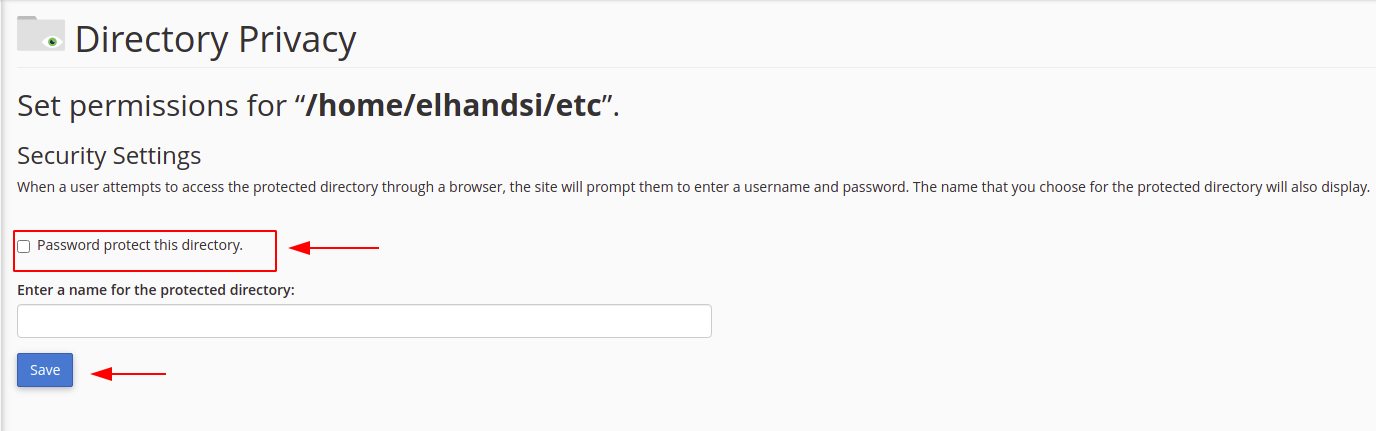
enter the chosen username and password then press save